


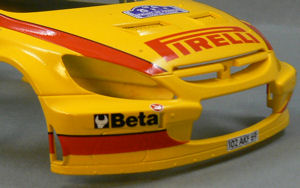
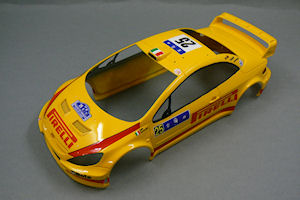
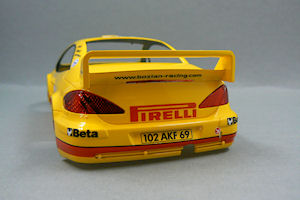
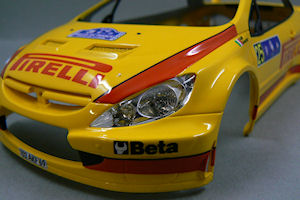
Peugeot 307 WRC "Pirelli"
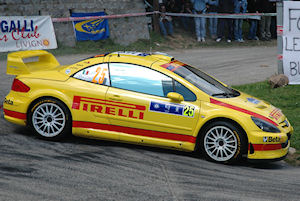
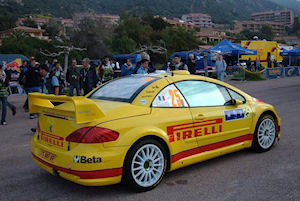
Peugeot 307 WRC "Pirelli", Tour de Corse 2006
2007, April 1
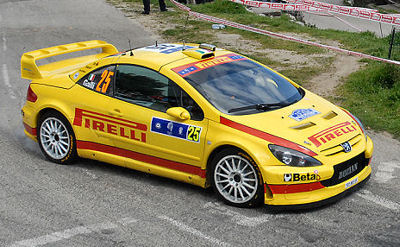
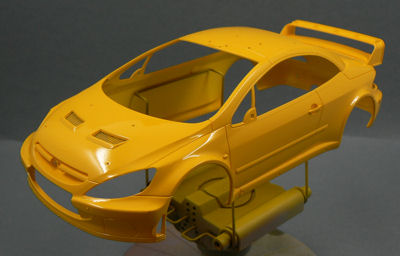
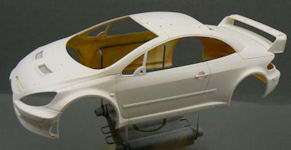
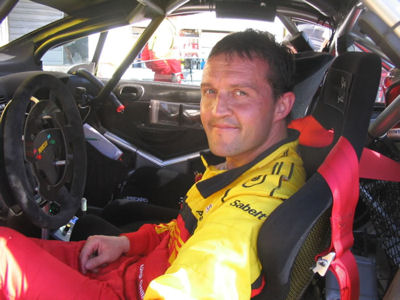
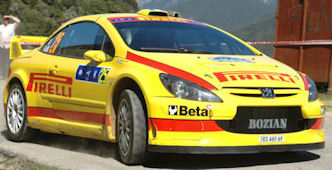
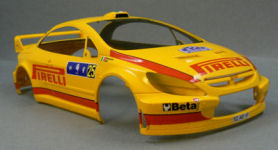
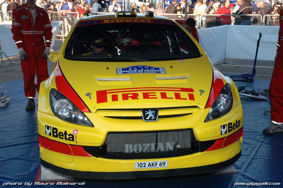
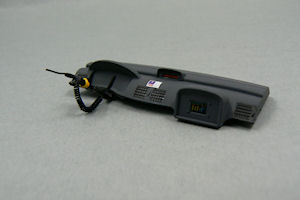
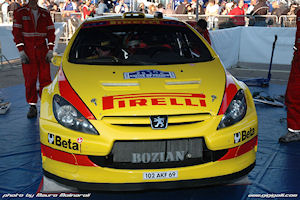
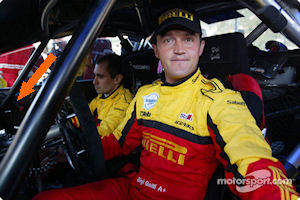
This will be the Build Report for the Peugeot 307 WRC Pirelli, as driven by Gigi Galli in 2006.In case you're wondering, what's this all about, here's a picture of the real thing:
Why this car ?
Why this driver ?
Why another kit (asks my girlfriend) ?
This car, because I really like the livery. Simple but very attractive. And apart from that, relatively easy for a returning modeler.
This driver, because Gigi Galli brings a bit of action to the WRC. Apart from his, often spectacular, driving style, I really admire him for his temperament and emotions.
The best example being that he tried to molest his co-driver (some rally in 2005 when he was driving for Mitsubishi) because he got some pace-notes wrong, while driving at excessive speeds across a special stage. I love that guy !
And another kit because I feel that I have an obligation to support the economy of the world. Or any other reason I need to buy another kit which might get built somewhere in this millenium...
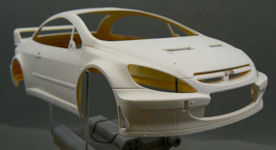
This car is going to be build from the Tamiya Peugeot 307 WRC.
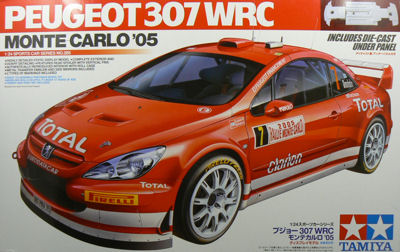
The eagle-eyed reader of this page might say that there is a slight difference in color and sponsor-markings between the two cars.
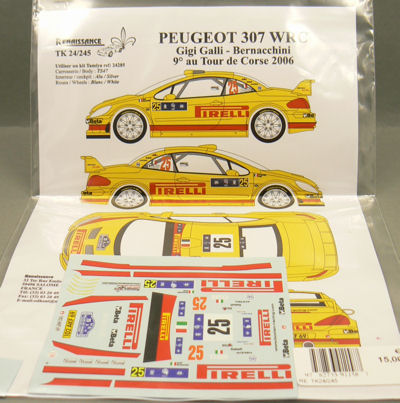
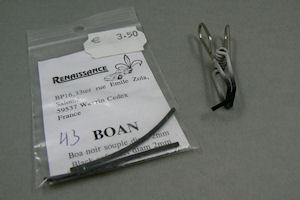
To that end I bought the transkit from Renaissance (which I ordered from Domino Modelbouw in Belgium).
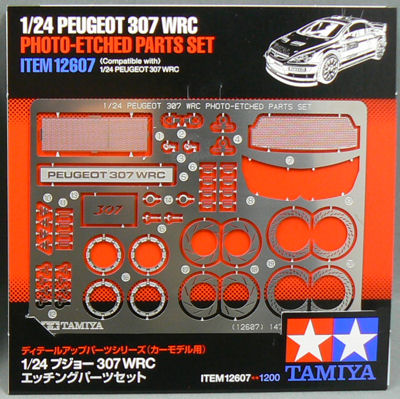
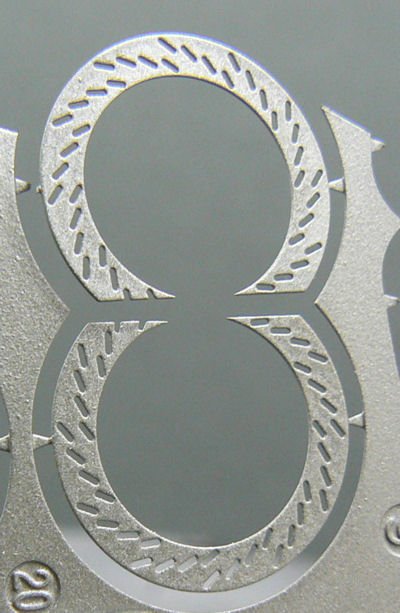
To add a bit of extra detail to the kit I am going to use the photo etch set that Tamiya has released for this kit. Actually, apart from the dreadful die-cast chassis of this model (which has less detail than the regular plastic ones), another 'low-point' is the fact that there are several parts on the car that have so little detail (like the brake-discs) that you almost HAVE TO buy this PE set, to make it look anywhere near realistic.
A sad development if you ask me. But as this kit is the best of the two Peugeot 307 WRC kits on the market you don't have much choice if you're into building recent WRC cars.
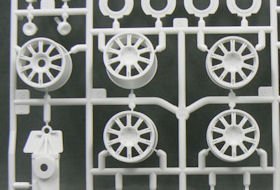
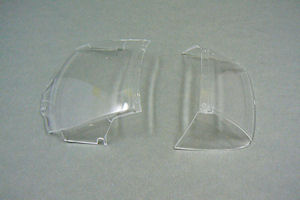
The Rims
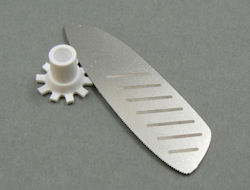
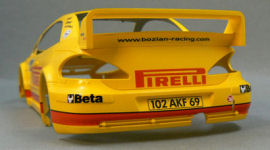
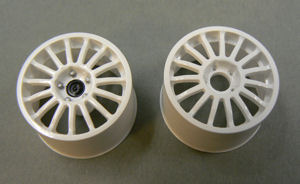
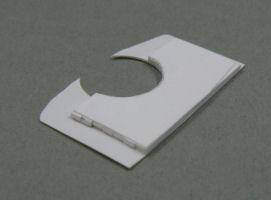
The first job at hand for this build was the adaptation of the rims. If you look closely at the first image and the image of the box of the kit, you'll see that there's a difference between the rims.In the Tamiya kit there are 10-spoke rims supplied. The rims with which the Peugeot team took part in the Rally de Monaco in 2005 (the car that can be build from this kit).
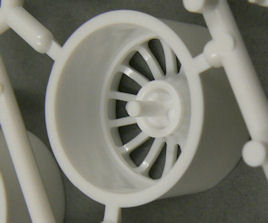
Gigi Galli however used 16-spoke OZ rims in the Tour de Corse rally (the version of this car which can be made with the decals from the transkit).
Luckily, I have a Peugeot 206 WRC Bozian Racing kit in my stash, which has exactly the 16-spoke rims I was looking for (right picture below).

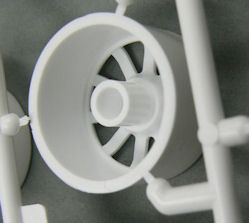
But, for this 307 kit, Tamiya has adopted a different style of attaching the wheels to the suspension. Where they normally use a male connection (left picture below), they used a female connection for the 307 (right picture below).
So, I had my work cut out. Because I wanted to use the 16-spoke wheels. So I somehow had to convert them to a female connection so that I can use them on the 307.
First action was cutting up the original rims and free them of their female connector.
I used a photo etched saw that I ordered from Rai-Ro in Germany.
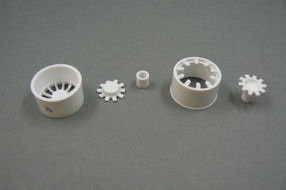
Next I removed the male connector from the 16-spoke rims. Just used a plain old cutter for that.
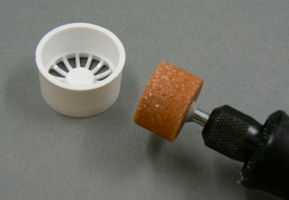
After that I used a grinding tool in my Dremel to shave off several mm's of the center of the rim, because of the difference in length between the male and female (longer) connector.
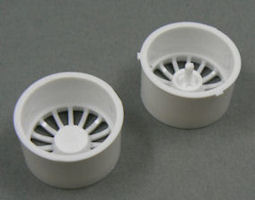
And after all this work I ended up with the following:
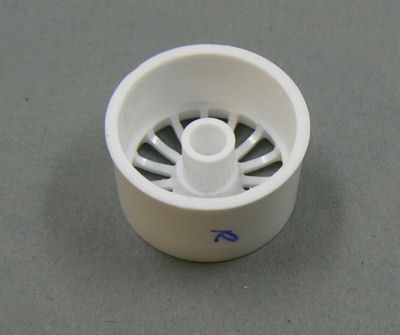
All in all a very nice operation. And I am pleased with the end result.
Now, the rims will be put aside to start painting the car.
Painting the body (part 1)
According to the instructions on the Renaissance transkit, the colour to use for the car is Tamiya TS47, Chrome Yellow.As I'm not very good at painting with the spray-can, I decided to decant the paint into a jar, let the solvent escape overnight, thin the paint with Tamiya's Lacquer Thinner and spray the paint on using my trusty Evolution 2-in-1 airbrush.
The paint went on superb. Between the different coats I had to sand a bit because of dust which had been trapped in the paint, but otherwise everything went smooth.
In the end I had sprayed 2 fine layers and 2 heavy layers of paint and the shine to the paint was already looking very promising, without even some kind of polishing. This was going to be very nice.
But then came a discussion on Automotive Forums where another member was also building Gigi Galli's 307.
And in this thread a discussion was started concerning the correctness of the colour of the car. At first I was the defender of TS47, but after I took some pictures of this car outside in the sun, I too had to conclude that this particular colour is too dark. Maybe a result of putting 4 layers of paint on the model, which deepened the colour a bit.
But after I took the pictures I decided that I would strip the paintjob and will repaint the car with Tamiya acrylic paint colour X-8, Lemon Yellow.
Sadly, the layer's of paint are very stubborn and won't come loose easily, even after soaking for several days in brake fluid, so that's a bit of a setback.
The show must go on
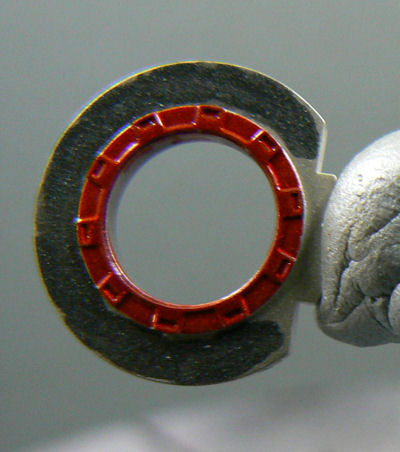
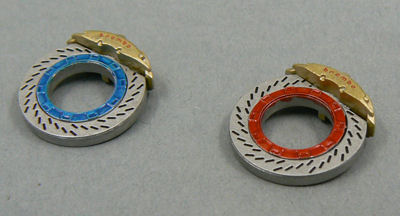
While the body was soaking in the brake fluid, I went to work on some other parts of this kit.The brakes were the first parts that were taken on. For the brake-disc faces I was going to use the intended etched parts. I painted the discs and the etched parts with Titanium Silver (X31) from Tamiya.
I must say that it is a very stubborn colour. I had a hard time stirring the paint to an homogenous mixture. And even than, after thinning with X20A, I had problems airbrushing the paint onto the parts. It was as if the airbrush was clogged as soon as I poured the paint into the cup. Strange.
The brake calipers were painted with Titanium Gold (X32) from Tamiya. And this colour was the total opposite. I had no problem getting an even coat onto the parts with a regular brush. Peculiar.
But in the end I'm satisfied with the result.
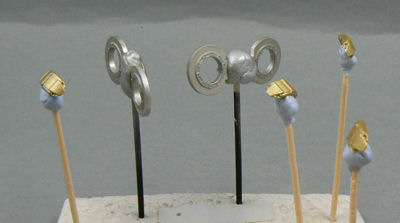
Last thing I did on the brake-discs was paint the faces of the brakes were the PE part is going to come X10 Gun Metal. The idea is that the darker colour will show through the slots in the PE brake-disc faces, to add a bit more depth to the brakes.
2007, April 24 - Preparing the body (once again)
As can be read at the top of this page, I wasn't happy with the way the colour of the car turned out (Tamiya TS-47).After bathing for several weeks in brake-fluid, the paint just didn't want to come off. So I decided to help a bit. With the aid of an old (...) toothbrush and an even older scotch brite pad I managed to get most of the paint off.
The reluctant bits I attacked with a bit of sanding paper, and after I had washed the body in some lukewarm water with a bit of dish-washing soap, it looked like new again.
Well, sort of.
After this laborious process I decanted a bit of Tamiya White Primer into a jar (and spilling half the jar in the process), and sprayed the body with several layers of this primer.
Firstly, because I wanted an even white finish for the yellow to go onto, and secondly because it gave me a nice opportunity to see where I had to do some reworking...
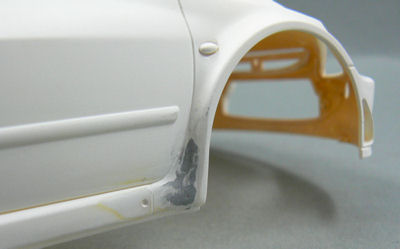
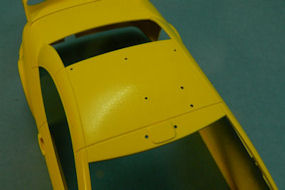
And reworking I had to do. Because I always intended to spray some primer onto the body, I figured that it might be smart to deepen the panel lines of the body a bit, to prevent them from filling up with primer and/or paint.
Sadly, it appeared that I don't have a very steady hand. Although I tried to be very careful, it happened once or twice that the scriber "got away", creating a new panel line where I didn't want it.
So out came the putty and the sand paper, to repair the damage I had done.
Decisions, decisions
Now that the body is prepared and ready to receive some new colour, I faced the unpleasant task of choosing which colour to use (or is that try) next.The contestants are : Revell Aqua Color Yellow, Tamiya X-8 Lemon Yellow, and Tamiya TS-47 Chrome Yellow.
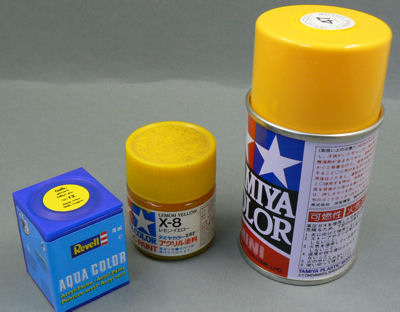
At least I knew which colour I wouldn't choose. Remained the choice between Revell and Tamiya X-8.
I've decided to try my hand at X-8 and in the next update you'll read whether that was the right choice or not.
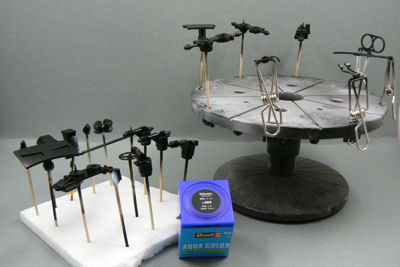
Apart from preparing the body, I also finished the brakes.
And I did some mass painting of semigloss black parts.
I painted the parts with Revell Aqua Color semigloss black. And I must say, I really love that colour. All colours from the Revell Aqua Color range, as a matter of fact.
They don't smell, they cover perfectly and very smooth, and even if you try to botch up, it turns out great. Highly recommended.
Right, after that commercial break, a nice picture of the parts (with some product placement added as a bonus).
That's it for this update.
See you next time !
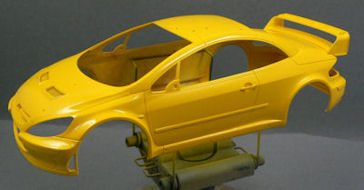
2007, May 16 - What's the colour of money ?
I should know by now. I've spent more than enough of it on the colour for this car.In my previous update I was very optimistic about Tamiya X-8 for this car. But sadly, this colour was also too dark.
Next was the runner-up, the Revell yellow. But, you might have guessed it, it was too light...
Luckily I had to go to the nearby city of Roermond to pay a local hobby store, who stocks Revell Aqua Color, a visit. Thanks to the mass painting shown above I was running out of semigloss black, so re-stocking was needed.
But alas, no semigloss black in stock... But, he did have a spraycan of Tamiya TS-16. Which I bought. One more different tone of yellow wouldn't hurt I thought.
And it didn't hurt indeed. Because this was the yellow I've been looking for from the beginning. I really don't understand that Renaissance recommends TS47. That colour is really way too dark.
Anyway, I finally got THE colour, so off spraying I went (after decanting the paint into a jar).
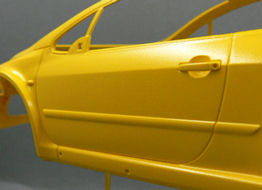
As I was a bit lazy, I didn't bother stripping the (very thin) layers of X-8 and Revell. Not good. It appeared that the lacquer from the spraycan reacted with the previous layers of paint. And after spraying a first layer of paint I got a nice cracked paintjob.
But, to my big surprise (and relief), after a few days drying, the cracks are almost gone. The irregularities in the paintjob that remain can easily be smoothed out with MicroMesh sanding cloths.
So in the end, the drama wasn't such a drama after all. Phew.
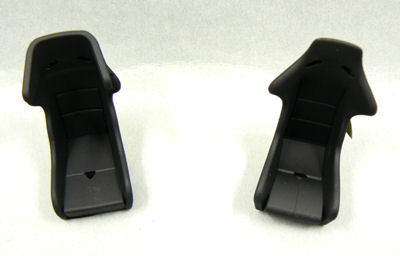
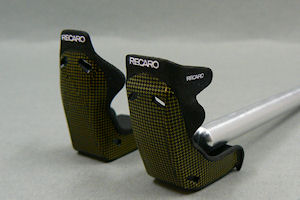
Have a seat, no, have two !
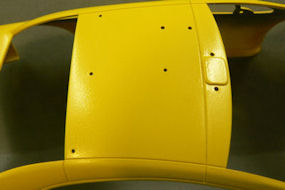
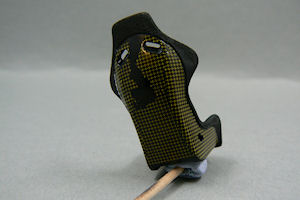
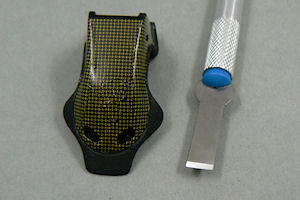
Between all the stress I've been having with the colour choice and stripping paint and all, I've still managed to get some other things done.One of them is cutting some holes in the seats, so that I can put some aftermarket seatbelts on the seats.
The other is painting the seats. The backside has been painted gloss black, to provide a smooth surface for the carbon fiber decals that go on the back.
The rest of the seats is painted flat black. I have been thinking about applying some texture to the seats. From the reference picture you can see that the fabric of the seats has a very fine structure.
But, as with the roof of Inspector Morse's Jaguar, I've decided that it just isn't possible to create a fine enough texture in this scale.
Apart from the seats I've also been working on the suspension parts.
The suspension is finished in the meantime, with the brake-discs also attached, but I haven't taken any pictures yet. Those will be for the next update.
August 26, 2007 - Body
As with the two other builds I'm currently working on, progress is relatively slow, but going on nevertheless.As I mentioned in the previous update, the paintwork on the body was more or less finished, but because I was a bit lazy the layers of paint slightly reacted to eachother leaving a bit of an irregular surface.
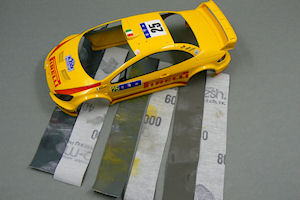
It's about time I took care of it. For this I used a Micromesh sanding cloth. I wetsanded the body to get an even layer.
Although it still looks irregular (second picture is taken after the sanding), the layer feels very smooth. I'll shoot a layer of gloss clear on it, before I will apply the decals. The gloss clear will remove the matt/gloss effects because of the sanding and will give me a nice (and hopefully) even layer for applying the decals.
Interior
Work has also been done on the interior of the car.In the previous update I already showed the seats. In this update I'll show several other parts of the interior.
Almost all parts of the interior have been painted (but won't be shown here just yet). Some need some extra detail work and will be shown in another update.
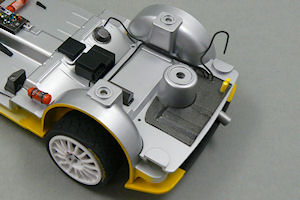
First I'll show the floor of the car and roll cage.
They both have been painted with Tamiya TS17 (gloss aluminium) first. I used an airbrush to apply the colour. After that, detail painting has been carried out with brush or airbrush to paint the black parts semi gloss black (Revell aquacolor).
Final colour (a kind of kevlar I think), the yellowish/tannish colour, should be mixed from orange (2 parts) and buff (1 part) according to the building instructions. But I didn't think the colour was right, so I made my own mix of orange (1 part), yellow (1 part) and buff (2 parts).
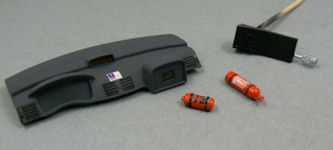
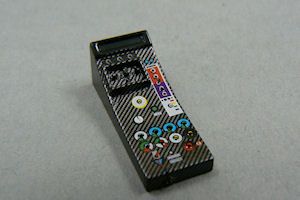
Apart from these parts, I've also managed to finish the steering wheel (apart from the gearshift rings) the dashboard and fire extinguishers. On the second picture there's also the central console, but that still needs (a lot of) extra detailing.
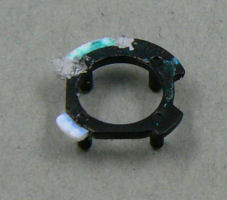
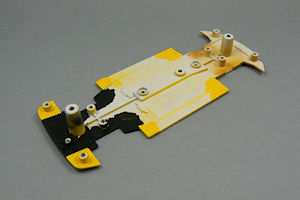
Chassis
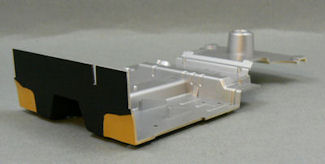
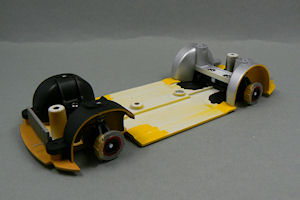
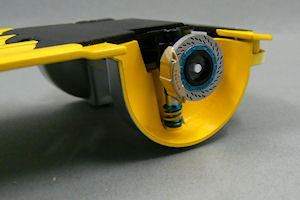
Another area of the car I've been working on is the bottom plate and the wheel arches.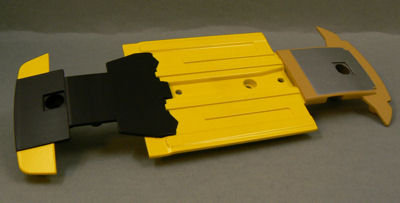
Finishing the bottom plate was pretty straightforward. I sprayed the body colour (yellow) on first and afterwards I masked of the required areas for painting the kevlar, semi gloss black and metallic grey.
This all went without a problem. I might give it a coat of flat clear to reduce the shininess. But as it is the bottom of the car, probably no one will ever see it, so I might leave it just as it is.
The front wheel arches were painted kevlar from the inside and semi gloss black from the outside.
Afterwards, I think I made an error painting the whole wheel arches kevlar. But I've been looking long and hard at several reference pictures and thought I had made the right choice. But than I found a picture from which I concluded that the kevlar part was only on the outside of the wheel arches and that the rest should be painted body color.
But I've decided that I'll leave it this way, as the kevlar colour is a bit yellowish already.

After all the painting I testfitted the floor and bottom plate with the wheel arches.
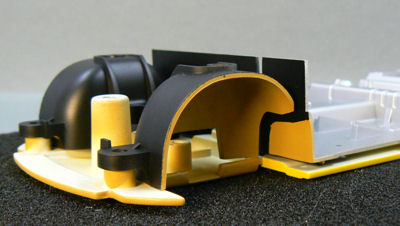
Where I almost assumed that the parts would fit in such a way that the interior colour of the wheelarches would continue on the bottom plate, I found out, sadly, that this wasn't the case.
Which I found strange, as I had followed the painting instructions as Tamiya indicated.
Now I have to conclude that I should have testfitted the parts before masking off the parts... I will leave it like this for the time being as it won't be very visible once the wheel is mounted. But it's certainly a lesson for next time. First test fit the parts, than paint them...
End of this update.
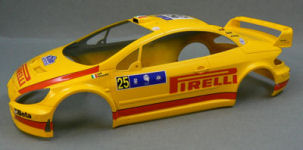
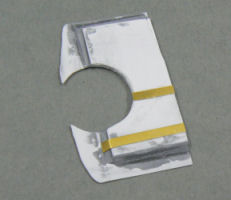
2007, October 16 - Decalling the body
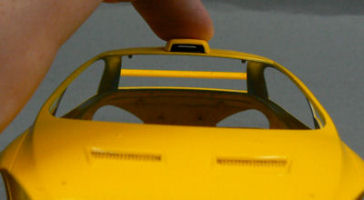
Before I started with decalling car body, I glued the air scoop on the roof of the car. I did sand the rear end of the air scoop a bit. I saw on some reference pictures that the air scoop wasn't closed. But the part provided with the kit was closed, so I opened it up.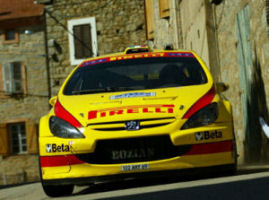
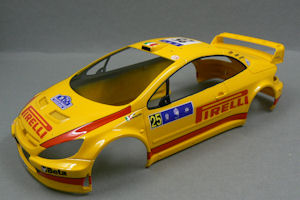
Decalling actually went without a problem. The decals for this build were made by Renaissance and are really great. I used MicroScale Set and Sol to get the decals to conform to the shape of the car. And bar for a few minor niggles, everything went without a hitch.
You can see the current state of affairs on the pictures below.
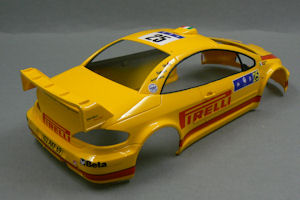
The keen observer of the pictures above may have noticed the minor niggles I was referring to.
Although I used Set and Sol on the decals, a few of them didn't want to down perfectly, as can be seen in the following pictures.
I am going to try to rectify that, but my efforts have so far been fruitless... But I keep trying.
Another minor thing I want to fix before I clearcoat the body is the fact that some of the decals do not completely cover the intended area. See the pictures below.
I want to try and mix the right shade of red to fill-in the spots that have not been covered by the decals.
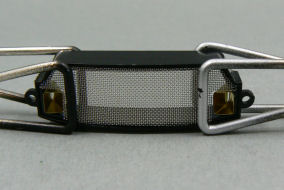
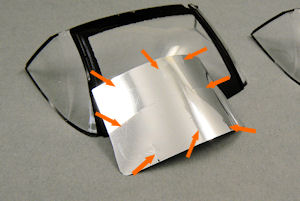
Brake duct
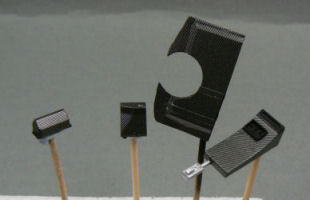
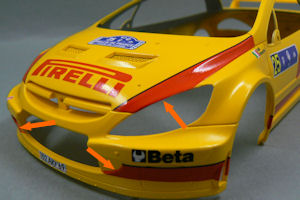
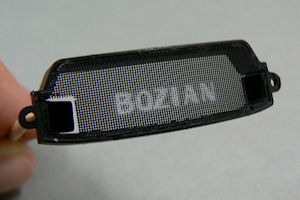
Another thing I've been working on for this kit is the brake ducts.On the tarmac rallies the Peugeot 307 (at least Gigi Galli's car) hade been equipped with bigger brake ducts. There are no brake ducts in Tamiya's kit, so this was something I had to scratchbuild.
On the right picture above, the brake ducts can be seen to the right and left of the Bozian-lettering on the intake mesh.
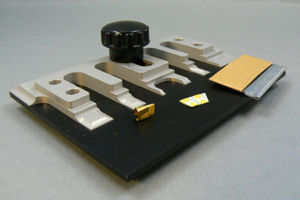
After I made a draft of the brake ducts in 3D, I cut the flat parts from a thin sheet of brass and folded the parts with my newly acquired Etchmate tool.
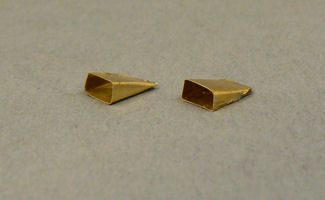
The brake ducts on the picture above aren't the final ones. I wasn't totally satisfied with the ones above, so I've been folding some new ones, of which I don't have taken pictures yet.
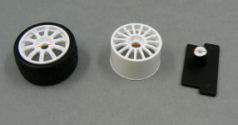
Rims
The final parts I want to show in this update are the rims.After I adapted the 15-spoke rims from the Bozian Peugeot 206 kit to this car, I painted them white with Tamiya X-2.
In the meantime I've also painted the bolts of the wheels and the centers of the rims.
For the spare wheel I have drilled out the holes where the bolts should go (not that anybody will ever see, because the spare wheel will be tucked away in the back of the car).
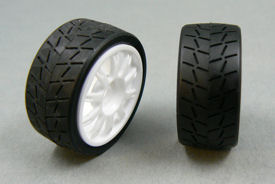
On the right picture are some tires (with the wrong rims). The left tyre has been sanded (a bit) to get rid of the mould line which runs over the middle (as can be seen on the right tyre).
End of this update...
2007, November 25 - Work continues (finally)
After I've been working for several weeks on the Ferrari, it was about time that I took up working on this car again.But that actually happened sooner than I expected (because of the paint problems I encountered with the Ferrari).
First thing I wanted to do was change the footrest of the driver.
I glued a piece of styrene inside the opening that separated the front and rear part of the footrest. I'm not 100% sure that the footrest in Gigi Galli's car was like this as I have no picture of this part from Gigi's car. And in my picture archive I've found pictures both with and without the opening.
But the pictures of the most recently run Peugeot 307's show the opening to be closed, so I assume that it was this way in Gigi's car too.

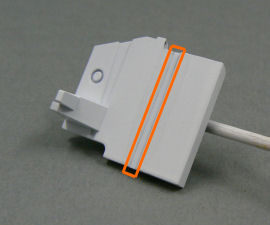
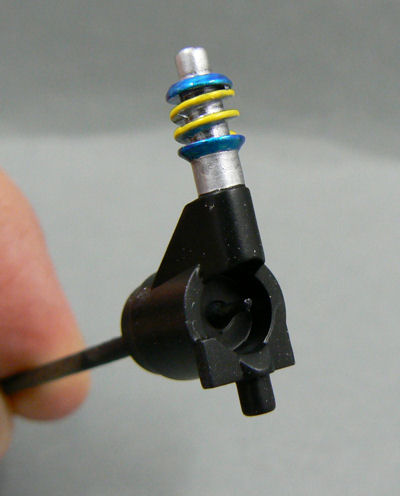
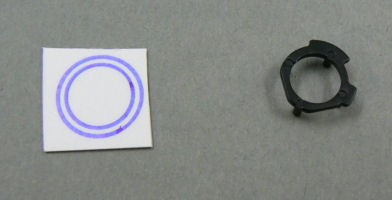
Another part I needed to change was the shift ring on the steering wheel.
On the left picture below, the original shift ring can be seen. It is obvious that it differs from the one in the left picture above.
So I made a new piece of ring from styrene sheet and glued it to the old shift ring. The gaps that were left were filled with Tamiya putty. The part still needs to be sanded smooth but overall I'm happy with the result.
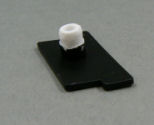
Next up was a part I had to change, but actually hadn't planned to change.
When I compared the original spare wheel with the new spare wheel I noticed that recessed part where the wheel bolts should go was a bit more narrow on the new part.
So what you might wonder. But to fix the shell of the car to the bottom I need to mount a part into the recessed part of the spare wheel (see pictures below). And with the new wheel I found out that it wouldn't fit.
So out came the file and I filed the offending part to size.
The final part I've been working on recently is the fuel cell.
I must admit that Tamiya has been cutting corners with this kit. The chassis of the car is not very detailed, being a cast iron part. But that is not where they have stopped. Also the interior lacks detail.
I do admit that the fuel cell won't be very visible, but I think it would have been easy to include it in the moulds. But as Tamiya didn't do that, I'll be scratchbuilding it from styrene sheet and strip.
This is how far I've gotten up till now:
The cut-out in the middle was necessary because of the mounting pin that is underneath the spare wheel.
End of this update.
2008, January 13 - Interior
Several things have been done concerning the interior of the car.The last picture in the last update showed the "raw" build of the fuel cell. Work has been done on the fuel cell in the meantime and it is nearing completion.
The right picture above shows the fuel cell and several other parts from the interior covered in carbon pattern decals.
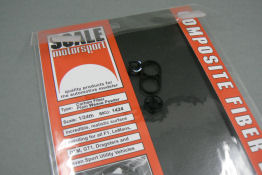
To simulate the carbon pattern I used decals from Scale Motorsport. I am planning to spray a very thin layer of Tamiya X-19 smoke on the carbon decals to darken them a bit.
Air intake
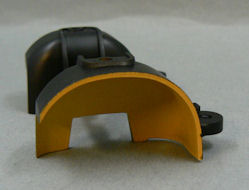
Work has also been done on the air intake.On the previous page I already showed the brake ducts I had made for this car.
In the meantime I've also made the grating for the air intake and gave a layer of primer to make sure that the paint will adhere properly to the metal, brass and plastic components.
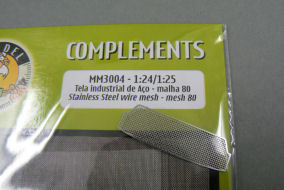
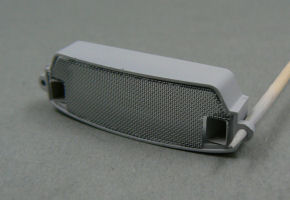
On the first picture you can see the difference between the original grating that was in the PE set from Tamiya and the mesh I have used for the grating.
I think that the finer mesh gives a more realistic look to the air intake.
There are some minor things I need to correct with the air intake and than it can receive it's final paint coat.
End of this update.
May 1, 2008 - Clear !
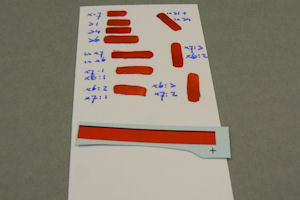
It was about time that this car would get a layer of clear on.But before I could do that, I had to touch up a few spots with "Pirelli red". When I applied the decals I made some minor mistakes in positioning them. So a few spots needed some extra attention.
Although I have about 6 or 7 shades of red in my paint collection, the right one wasn't there. So I had to mix the correct shade of red.
That took some time, but I in the end I managed to find a shade which looked good enough.
After the spots had been touched up, I let the paint dry for some more days. After that, it was time for the clear.
I used the same 2K clear I used on the Ferrari F430. Thanks to my new fan (higher capacity) there were considerably less fumes inside the cabin and the room.
After I cleared the car I put a cover in front of the airbrush cabin (leaving only a small opening for the air) to prevent dust from settling on the model during drying of the clear.
This, the cover, and the more powerfull fan really helped in preventing dust from falling onto the drying clear.
The results of the clearing can be seen below.
In the pictures it seems like there is a very thick layer of clear on the model. But in reality, it isn't as pronounced. And apart from that, I've noticed that the clear shrinks slightly as time passes. The pictures above have been taken only a few days after the clearing process.
In those pictures, you can also see that I have painted the window trims on the car.
And if you look closely you can also see that I have to do it again. Especially the lines below the windows aren't the tidiest. I think that's a result of the way I masked the window trim.
I put masking tape over the window trim, and using a new and sharp #11 blade in my hobby knife I cut the masking tape along the window trim. But the line along which I had to cut the tape wasn't very clear everywhere. So that's why it's a bit of a jagged edge at the bottom of the windows.
I'll be masking the window trim again shortly. But this time I'm going to slice the Tamiya masking tape into very narrow strips. The advantage is that they're still flexible enough to be bend along complex curves. Once these small strips are on, I'll mask off the rest of the car and proceed with the painting.
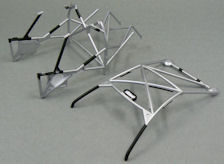
Work on the chassis
I've also been working on the chassis of the car.I was about to put it together. But during a final dryfit, I noticed that the top side of the chassis was still partly visible because the wheel wells don't fit up to the body shell.
That's why I decided to paint part of the top side of the chassis, as can be seen in the first picture below.
Otherwise, assembly of the wheel wells and suspension was pretty straightforward. With the crews that Tamiya provided, the wheel wells are screwed to the floor plate.
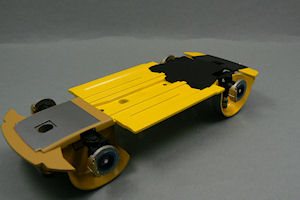
Only part that I have to take care of now, to finish the chassis, is the exhaust-driveshaft section. At least, that is what the lump of plastic has to depict...
Other work
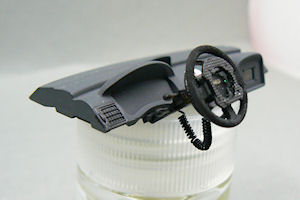
Some small other things I've been working on are listed below.First up is the dashboard. As I plan to build the cars with the windows rolled down, I decided that the dashboard might use a bit of extra attention.
On my reference pictures there's a cable running from the steering wheel to the dashboard. So I wound a small piece of insulated wire around a plastic rod to create the cable shown below.
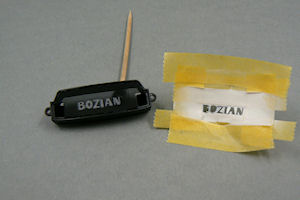
Apart from that I've also been working on the air intake. On the real car the word "Bozian" is painted on the grille of the air intake. Renaissance has included a Bozian decal in their decal set. But as I've used a different kind of mesh for the grille, the decal could not be used.
That's why I decided to make a template and paint the letters on the grille.
It took me several attempts to get the size of the letters correct, but in the end it turned out great.
August 1, 2008 - the finishing touch
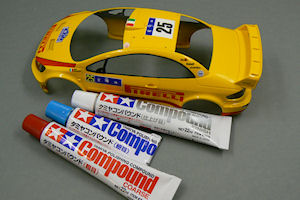
After a considerable amount of time not working on this car, I've taken it up once more.At first I was thrilled after I sprayed the clear lacquer onto the body. But after the excitement had been subdued a bit, I noticed that there were several spots on the car where the finish was quite rough.
So out came the ModelMesh sanding/polishing cloths, and after that the Tamiya polishing compounds.
And after the whole car had received this treatment, it finally looked the way I wanted.
The layer of clear is pretty hard (which is only good), and it took quite some time to reach the current state. But I'm very happy with it, although, on a few spots I managed to sand/polish through layers of clear and paint, so these spots need to be touched up.
With all the sanding and polishing, I also had to redo the window trim. But as my first wasn't so good anyway, this was no problem (in the image below, the window trim still needs to be done).
Mirror, mirror on the wall...
The original car I'm trying to replicate has reflective and/or quite dark window foil used on the windows.Probably to keep the sun out in the hot and sunny conditions during the rally of Corsica.
I'm planning to recreate this look on the model and therefore I have bought some automotive window foils to try and see how this will work on the model.
First some pictures of the original:
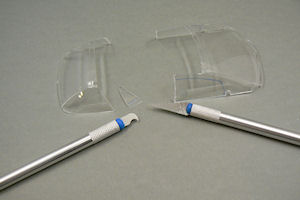
Before testing this foil, I already knew that because of the foil the interior of the car would be almost invisible. That's why I decided to cut up the supplied one piece window section, so it was possible to show the car with the driver's and co-driver's windows rolled down.
For this delicate operation I used a saw blade and a scriber.
As can be seen on the left image below, I drew the outline of the section that I wanted to keep first. After that I applied several layers of masking tape to the window the mark the border along which I had to scribe the window.
The masking tape was used for two reasons; first I had a border along which I could guide the scriber. And second reason is that it was used to protect the part of the window I wanted to keep.
After I had cut up the windows, I planned to do some tests as to how the foil should be applied. To the inside, or the outside of the windows.
Would it be possible to place decals on the foil ? Should I put decals on the window on the outside and foil on the inside ?
In general, I had several things I wanted to check before I was going to apply the foil.
First a little teaser with some foil applied to one of the back windows of the car. I fixed the window with some Tamiya masking tape, which I also used to fix the foil to the outside of the window.

Looks pretty neat, if I may say so myself.
But now it was time to test. I used some left-overs from the cut up windows of the car.
As can be seen in the above picture to the left, it is no problem to put a decal directly onto the window foil.
If you compare both pictures with eachother you can clearly see that putting the decal onto the foil is the way to go. Because of the thickness of the plastic window you can see a reflection of the decal on the right picture. Not good.
And another reason for putting the foil to the outside of the window is the fact that the glue/soap residue will be hidden. On the picture to the right you can clearly see the residue of the white glue/water mixture I used for fixing the foil to the window.
Sadly, it is not possible to put the foil on the outside for every window.
The rear window of the car has a black trim from the inside, so glueing the foil to the outside would look bad.
For the painting of the black trim, Tamiya has conveniently provided masks for the rear and front windows.
After painting I carefully removed the masks so I could use them to cut the required pieces of window foil.
But after applying the chrome foil to the rear window, I soon discovered that the rear window of this model is too curvy. The foil just wouldn't stick to the window.
I thought that cutting a few slits in the foil would make it conform better to the shape of the rear window.
Yes and no. Yes it did conform better, but no, it was still not good enough. Apart from that, the cuts I made in the foil were quite visible. Not a major problem, but it was something that didn't feel right.
In the end I did try to cut the foil for the rear window into four separate pieces, so I was better able to get the foil to conform to the window shape. But the ugly cuts were still visible, and also with these small piece I had severe problems getting them to stick to the window...
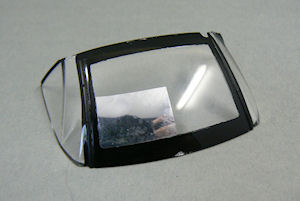
As you can see in the images above, none of the options is really satisfying.
And to top it all off, in making the slits/cuts in the foil I managed to slightly damage the rear window. Luckily I had another 307 WRC lying around and just nicked the rear window from that car, so that I could keep working on this kit.
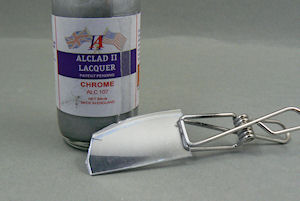
Then I remembered that I still have some Alclad II Chrome paint lying around.
I tested the chrome on one of the scrap pieces of window I had lying around, and it actually looks quite all right (as you can see in the left image below).
As a matter of fact, it is even slightly transparent (although VERY slightly). I would have preffered to use the foil, but as it is impossible (at least for me) to get it to conform to the window, I will be going for the Alclad II look.
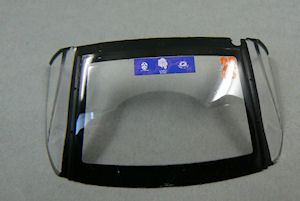
As I was going to apply the window foil to the inside of the rear window, I had already applied 2 decals to the window foil, before I found out that I couldn't get the foil to lay down properly.
During the foil application process the decals came loose and stuck to the rear window. With a bit of manouvering I got them where I wanted them. But then I damaged the window...
So once again, I had to remove and reapply the decals.
Removing the decals was a breeze, using MicroScale Set. But because of the removing I was afraid that the glue of the decal would not be strong enough to keep it fixed to the new rear window.
So I mixed a bit of KristalKlear white glue with some water to create my own decal glue. And I must admit that it worked perfectly. At least for sticking the decal to the window. Because I think that by using this own mixture the decals are silvering a bit as can be seen in the right image above.
But I will leave it like this because I wouldn't know how to fix this and because I don't want to move this decal once again.
More to follow in the next update !
2009, January 2 - Let's go inside
With all the work mainly concentrating on the outside of the car, it was about time to get working on the inside.Although a lot of the interior will be obscured by the fact the the front window will be slightly tinted and the rear windows will have a mirror finish, the interior can still be seen through the open windows at the driver side and the passenger side.
So it would be good to pay some attention to the several details which will be visible.
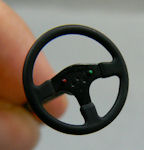
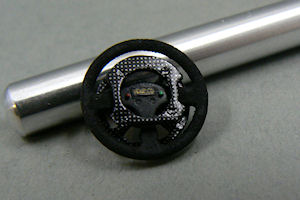
In one of the previous updates I already showed some work done on the steering wheel and some other interior parts. Now I will show you how it all turned out in the end, starting with the steering wheel.
The steering wheel consists of several parts. The wheel itself, of course, but also two shifting rings which fit around the wheel to shift gears.
In one of the previous updates I already showed some work done on a shifting ring.
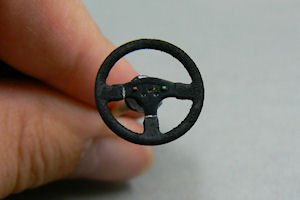
First of all, the wheel was covered with micro balloons, to simulate the texture of the real steering wheel. After that, the wheel was (once more) painted. In masking the parts of the wheel that should not be painted flat black, I managed to damage the Sparco decal I had put on the steering wheel. So this had to be replaced with a new one (not in the pictures above).
Than, the two shift rings, which have been covered with carbon fibre decals, were mounted. A new Sparco decal was put on the wheel, and the wheel was mounted on the dashboard.
After that I twisted a bit of wire around a toothpick, to simulate the cable running from the steering wheel to the dashboard.
Take a chair
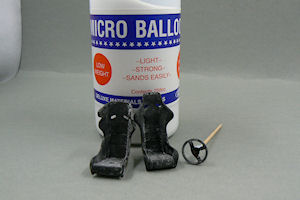
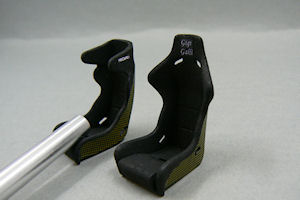
As can be seen in one of the images above, the seats for this car also got the Micro Balloons treatment. I did this to simulate the fabric of the seats. Simulating the fabric can be done in several ways, but the Micro Balloons way is for me the best way to get a good result.First I treated the seats with diluted KristalKlear glue, and after that I poured some Micro Balloons over the wet seat. After the glue had dried, I removed the excess Micro Balloons and brushed off the seats with a soft brush to remove the "sticky" loose Micro Balloons. After that I airbrushed some Revell Aquacolor semigloss black onto the seats and that's that.
Sadly, as with the steering wheel, some kevlar decals came of with the masking tape. As I hadn't any spares, I had to scrape the decals of the backing tape and used some diluted KristalKlear to glue the decals back in place.
Strangely enough this only happened with one seat... Because of the mirror finish of the rear windows, the patchwork on the back of Gigi's seat luckily can't be seen anymore.
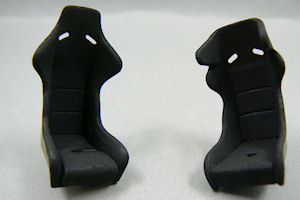
After that it was time to put some decals onto the seats. The instructions of the Renaissance transkit state that some Bozian Racing decals are put onto the headsupports of the seats. But when looking at some footage and reference pictures from the Tour de Corse Rally, I noticed that Gigi's car didn't feature any Bozian Racing decals in the interior. The instruction call for Bozian Racing decals where Recaro is seen in the image below.

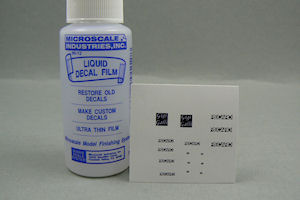
As there were no Recaro or Gigi Galli decals present in the transkit, or the original kit for that matter, I had to make my own (see above). After printing the decals, I covered them with some Liquid Decal Film to protect the decals.
Below is the end result, with which I'm very satsfied.
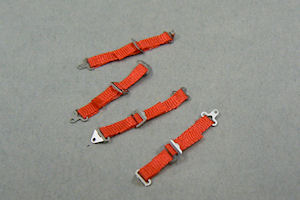
After all the decals were on, I could start with the seatbelts. Part of the seatbelts I was able to make before assembly of the interior. So that was easy.
The rest of the seatbelts I could only make when the seats and rollcage were mounted. Which proved to be a whole lot of fun...
The seatbelts were made of red silk ribbon, 2 mm wide. It's a perfect material for this job, in my eyes.
For the seatbelts I had to make some decals too, as I had no Sabelt decals lying around. The Sabelt logo's aren't actually decals, but just plain paper, which I fixed with double-sided tape to the seatbelts.
This double-sided tape was also put to good use making the seatbelts. I was afraid that glue would seep through the fabric and spoil the look of the seatbelts. The tape worked perfectly.

Further interior detailing
As could be seen on the previous page, I've done some additional detailing to several parts inside the car.I do realize that not all of them can be seen, but I felt like doing it anyway.
One of the parts that surely can't be seen after assembly is the fuel cell in the back of the car and the fuel lines and other details I decided to include.
The central console on the other hand will be very visible. And although the provided decal brings it a bit to life, I still thought that it looked too flat.
So after I had applied the decal, I drilled some holes in the console and inserted some round styrene into the holes. And after painting it looked way better.
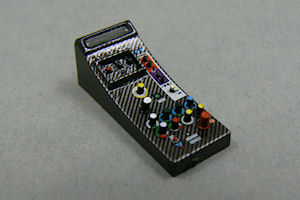
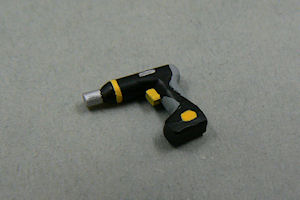
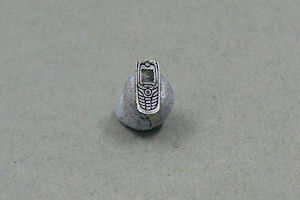
Other details I included where several small parts behind the center console, a handwrench (no picture), an electric handtool for the wheelbolts, a cellphone and some cables to liven things up a bit.
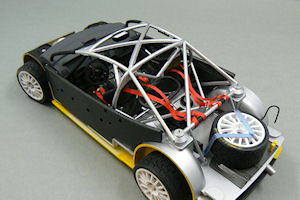
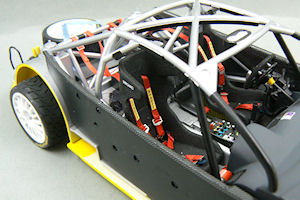
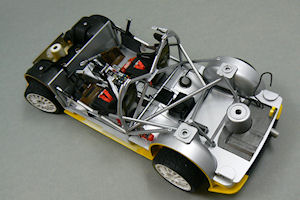
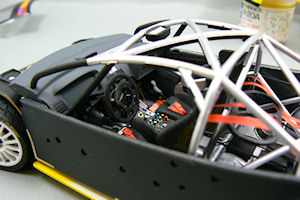
And when all is ready and assembled, the interior looks like this:
Shine a light
Now that the interior was finished, it was time to shift my attention back to the body of the car.The car was now definately nearing completion and I just couldn't wait to assemble the lights of the car. The rear lights were a breeze. A chrome plated back part and pre-coloured clear red light covers which could be clicked into place. A neat trick from Tamiya, so no glue is necessary.
Mounting the front lights wasn't too difficult either. But after I had fixed the lightpods (with glue this time) I saw in one of my reference pictures that the lightpods should be black instead of chrome.
If you wanted to make the Monaco 2005 version of this car, the chrome was good. But later in 2005 the lightpods became black instead of chrome...
So off they came. I painted them, and glued them in place once more. No problems there. Although I did manage to slighty fog one of the lightpod covers. But I took the covers from the other 307 kit I have so I could finish this build without further delay.

The final details
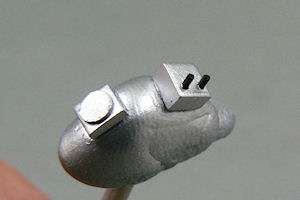
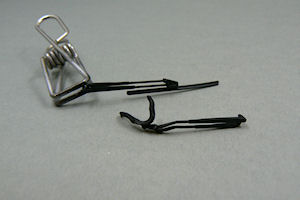
The finish line was looming on the horizon and there were a few small details I wanted to take care of before I assembled the car.For one, the antenna's provided in the kit were a bit out of scale. The limiting factor is the production process, which has nothing to do with Tamiya not doing a good enough job. There are some aftermarket accessoires available from Sakatsu, but these parts are really popular and almost always sold out. So I decided to make my own antenna's using the kits parts as base and some 0.13 mm thin steel wire.
I also decided to redo the Bozian logo on the air intake, because I wasn't really happy with my first attempt.
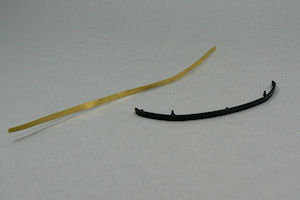
In the reference pictures I found on the internet I saw some hoses for cooling air inside the interior. The mirrors of the 307 have some sort of air intake at the front. And this air is blown into the interior to provide some cooling air for the driver and his co-driver.
I tried to replicate these cooling hoses with some materials from Renaissance.
In the meantime I had also put the decals on the front window. And now it was time to put the wiper on.
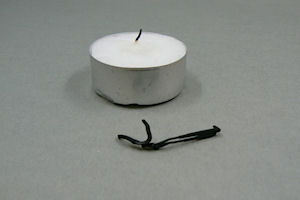
In the manual it says that you have to bend the wiper to fit the window. Carefully of course. I thought it might be a good idea to use some heat so as to make the bending easier.
Totally in style with the Christmas spirit I lit a candle to provide for a nice ambiance and some heat for the bending.
But I wasn't careful enough and it went a bit wrong... The wiper ended up a deformed heap of plastic, totally unusable. Luckily I could take the wiper from the other 307 kit I have as I have some photo-etched parts for that kit, so the original wiper will not be used for that one.
And this time I did the bending the way Tamiya told me to... And it worked.
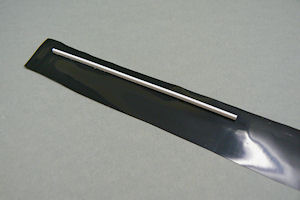
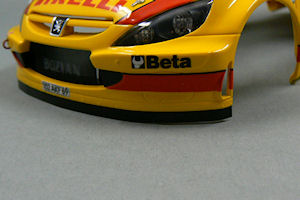
Another part with a bit of a scale thickness problem was the front lip at the bumper. The kit-provided plastic part was quite thick. And I intended to replicate this part from thin sheet metal. I had several thicknesses of brass lying around. But in the end I couldn't get it to work.
I almost gave up looking for a solution and was ready to use the original kit part, until I had to replace a toner-cartridge for the laser printer at my work. The bag in which the cartridge was contained seemed like the perfect material for the front lip.
So I cut up the bag and took some of it home. And in the end, I'm extremely happy with how the front lip turned out.
The final thing I wanted to do, was to wash the panellines of the car, to give it a bit more depth.
Although it's not to everyone's taste, I definately prefer this above unpainted panellines. The colour I used for the wash was a mix of dark brown and black oil-paints. It is quite a dark wash, but in all the reference images, the panel lines of the car appear very dark - almost black, that's why I chose this colour.
And I am very happy with how the car turned out. After the wash had dried and I had removed the excess oil-paints I waxed the car with The Treatment wax to remove the last bits of oil-paint and fingerprints.
Images of the finished car can be found in the Gallery.
