


Jaguar XJ220 "Martini" GT
Jaguar XJ220 "Martini" GT, Italian GT championship 1993
Go to latest entry (december 2010)2007, November 25
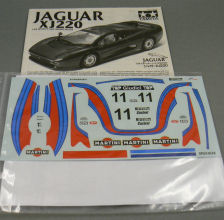
After the setback I experienced with the Ferrari F430 I decided that I would start (or at least select) another kit from my stack to get my spirits up.And the kit I selected is the Jaguar XJ220 from Tamiya (kitno. 24129).
But I won't be building the street version of this car. While checking out some on-line stores looking for after market parts for this kit I stumbled upon a decalset by scaleproduction.de on the MediaMix Hobby internet site.
With this decalset it was possible to make the Martini-sponsored GT Racing car of the Jaguar XJ220. And that is the end of it really. I was instantly hooked. Any car looks great in Martini-livery and especially this one. So the decision was quickly taken to try and build the Martini-sponsored version of this car.
I ordered the decalset from MediaMix (while Scaleproduction didn't have them anymore) and ordered the required BBS wheels directly from Scaleproduction.
I was ready to build.
Or wasn't I ? The few reference pictures provided with the decalsheet were nice for deciding where the decals should go. But what about the interior or the engineroom ?
The engineroom wasn't that important, but I surely couldn't leave the interior like the streetversion of this car.
But everywhere I looked, no pictures (or incredibly small ones) to be found.
Until a few weeks ago. While searching, once more, for pictures on this car, Google directed me to a Canon photography forum. And what do you know ? There were some excellent pictures all of a sudden.
It appeared that a Jaguar dealer in England had had this GT Racing Jaguar on display and a member of this forum (Tim Dunlop to be precise) had taken some pictures of the car.
I decided to contact Mr. Dunlop and he kindly provided me with a link to his webpage where more pictures were to be found.
Finally I had some useful pictures for building this car, and that is what I intend to do in this Build Report.
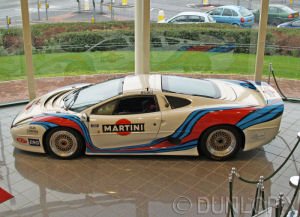
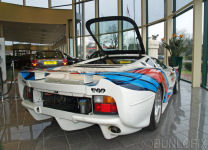
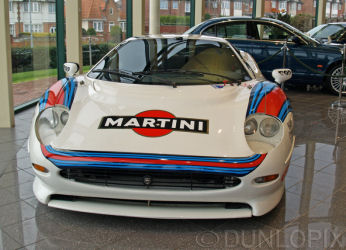
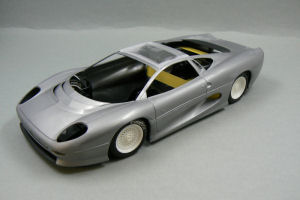
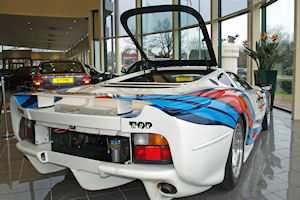
First I'll show a picture of how this build should turn out. All the pictures of the real car in this thread were taken by Tim Dunlop.
What's in the box ?
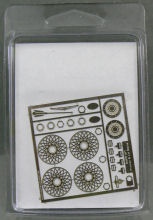
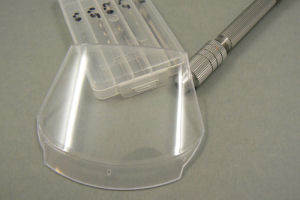
Next I'll show a few pictures of what's in the box: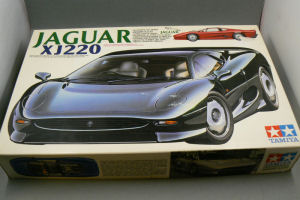
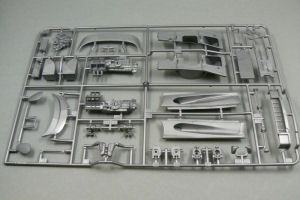
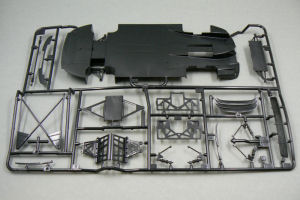
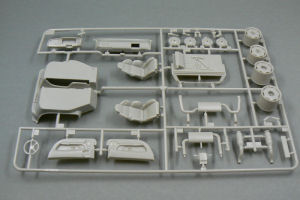
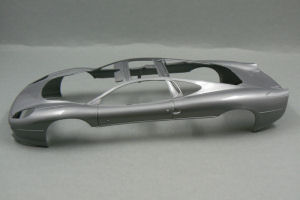
The clear parts aren't featured in those pictures. I've left them inside their plastic bag to protect them against scratches from handling. I'll take them out of the bag when I'll use them.
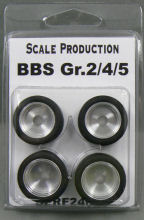
Next are a few pictures of the after market parts I'm going to use on this kit:
Now that I've presented my newest project, there's only one thing left to do: Start the project.
But the start of the project will be for the next update.
2008, January 13 - Let's get it started
Although I, still, haven't finished any of the other builds I'm currently working on, I couldn't contain myself and just HAD to start this build.The Martini livery is just too appealing to leave it sitting in the box any longer.
However, the deeper I delved into this project, the more "problems" I encountered.
First of all, the decal sheet. It looks nice, but it's not complete. Several sponsors seem to be missing (but it is probable that the sponsors varied between races), but more importantly, the Martini striping is not complete.
When looking at the pictures below, you can notice that the Martini striping is on AND beneath the rear spoiler. But the decal sheet has only one option, obviously on the rear spoiler.
Might seem minor, but I think it's a shame, as it would not have been much trouble to include it on the sheet.

Another thing I noticed was that the set of wheels I intended to use actually sucks. The rims are quite unrealistic and need a lot of work to get them mounted on this car. Apart from that, the tires are way too small.
Luckily I remembered having a BMW 635CSi Racing lying around. And the wheels on that car are exactly what I was looking for, for this Jaguar.
Another pleasant aspect of the BMW wheels and tires is the fact that they're also from a Tamiya kit, so fitting them to the Jag shouldn't be too difficult.
Than there's the fact that this kit is a right hand drive version of the car. And the racecar is a left hand drive... A lot of work needs to be done there. Not impossible, but also not something that I'd anticipated in the beginning.
Work that body
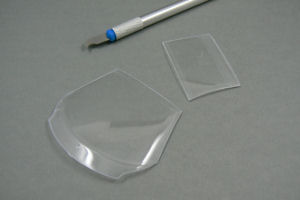
First task I set myself was to get the bodywork ready for primer and paint.The original kit is a roadgoing version with a transparent roof. But that won't be necessary for this build.
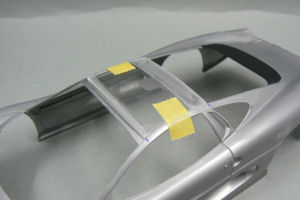
The roof of the car is however attached to the windscreen of the car. So I had to separate the windscreen and roof. Normally not a very exciting job, but as it was a clear part I needed to separate, I had to be extra careful.
But it worked out fine in the end.

Next I removed some parts from the main body which weren't on the race car.
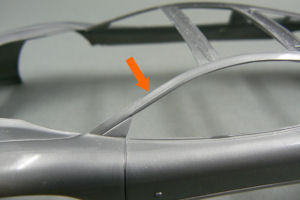
And I had to fix the left windscreen pillar. It was bent a bit, so the windscreen wouldn't fit properly.
So out came my girlfriends hairdryer and with some friendly persuasion I managed to straighten the pillar enough to get the windscreen to fit right.
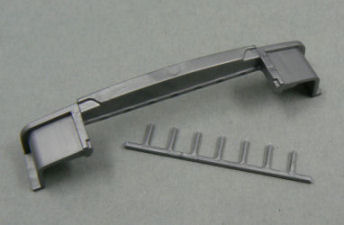
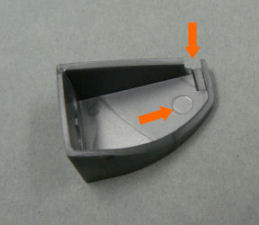
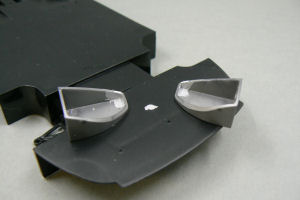
Below are several other parts I've been working on. However, the part on the right will need some additional work. An ejectorpin mark can be seen clearly. And also the opening for the mechanism to open and close the headlight covers.
But as the moveable covers won't be needed I will have to close the opening. And because the headlights will get a transparent cover, the ejectorpin mark needs to be removed too.
But that last part will be simple as the original headlight cover isappears to be inside the headlight pod, covering that ejectorpin mark.
The Wheels
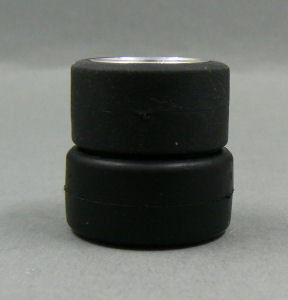
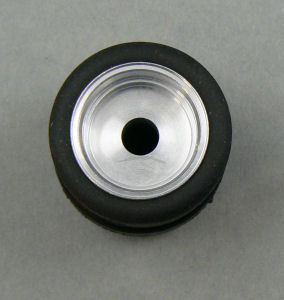
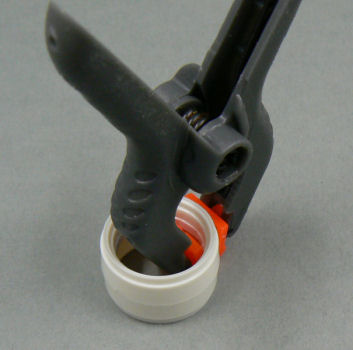
As I mentioned on the previous page, the wheels that I intended to use for this build are actually quite useless.On the picture below, the BMW tire is underneath the Scale Productions tire. As you can see is the SP tire quite a bit smaller.
And also the SP tire has only a hole in the middle. Whereas the original wheels of this car have a mounting pin to fit into the suspension assembly.
So I decided to use the wheels from the BMW kit.
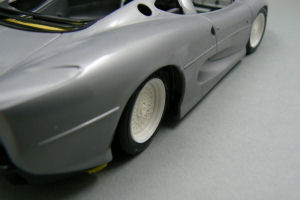
When looking at the picture of the car at the top of the previous page, you can see that the dish of the rearwheels lies deeper that of the front wheels.
So, out came the scriber, to cut out the center of 2 of the wheels.
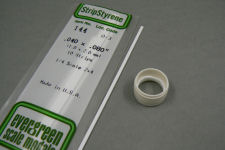
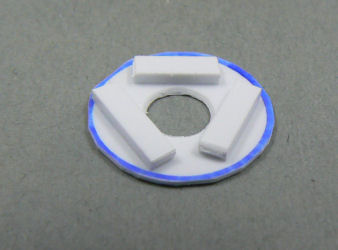
At first I wanted to put the dishes I cut out of the rims deeper into the rims. To that end I glued some styrene strip into the rims.

After I did this, I had to conclude that the dishes would get too far into the rim and that it would be nearly impossible to mount the wheels to the car without extensive plastic surgery.
So I had to take a different route.
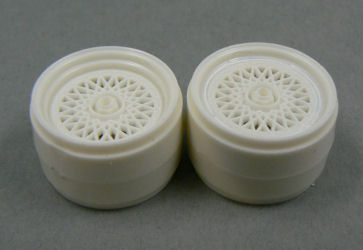
I milled out the extra styrene I glued into the rims (because otherwise they would interfere with the brake dishes) and mounted the dishes almost flush with the front of the wheel.
And I think it looks quite nice.
One slight problem is that because of the removal of the dishes, I needed to fill the gap between the outer rim and the dish. And that is still visible. I'll try to figure out a way to make it less visible.
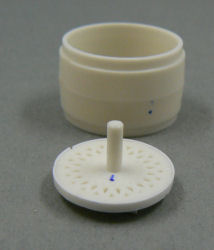
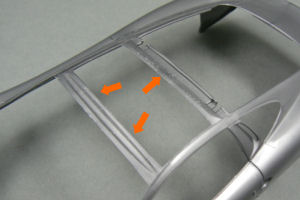
To get the dishes to sit right inside the rims I made a jig as can be seen the second picture above.
End of this update.
2008, February 18 - Fix that roof
As the roof of this version of the car is not transparent but body colour, I decided to glue the roof to the car.For this I used the thin cement from Tamiya, which worked a dream.
Sadly, after glueing the roof I noticed that the roof and body aren't flush. So I had to sand the roof part down.
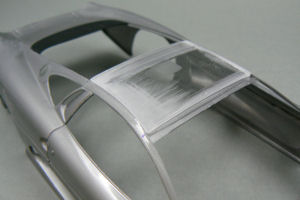
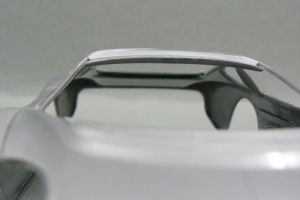
This operation went pretty well. Although the roof looks quite bad at the moment, I'm sure that when the primer is on, nothing can be seen of my sanding activities.
Other minor work
As mentioned in the previous update, the lightpods needed some work too.For the roadcar, Tamiya has made the lightpod covers moveable. But that's not necessary for the racing version I'm building. So I had to hide the holes for the mechanism.
Apart from the lightpod, there was also a hole in the floorplate (right picture below) of the car (where the lever for the mechanism was situated).
I used Tamiya grey putty to fill the holes and if the holes were too big, I first closed them with strip styrene.
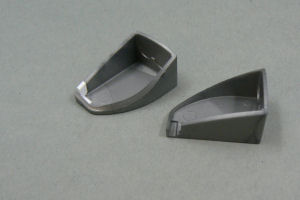
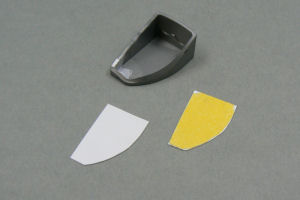
After this first part of the adaptations to the lightpods, I had to remove and/or fill the ejector-pin marks that were quite visible on the bottom of the lightpods.
At first I thought of carefully scraping them away. But severel marks lay on the surface while others were below the surface. So sanding would be tough. I would have to fill first with putty and than I could sand it flat.
But that was way too much work in my eyes. So I used Tamiya masking tape to make a template and with this template I cut a new bottom from sheet styrene (0.25 mm thickness).
And I'm satisfied with the endresult.
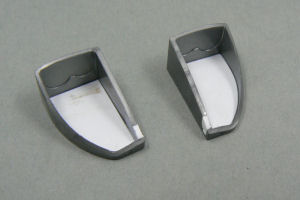
To seal the seams between the housing and the inserts I used Tamiya thin cement to fill the seams. And it looks good so far. Maybe I may need to correct some things after the primer is on, but for now I'm ready with the lightpods.
Other minor work was done on the floorplate.
On the back of the floorplate there was a hole where the licenseplate should be mounted. But as I won't be using a licenseplate in this build I filled the hole with strip styrene.
I also made a start with converting the car to a left hand drive one. Although it's only a very minor step. I only drilled an additional hole in the windscreen for the wipers.
The original hole for the driver's wiper has been filled with Krystal Klear glue in the meantime.
The first batch of parts has been painted in the meantime, but that's not very spectacular, so pictures of painted parts will be in the next update.
A dryfit
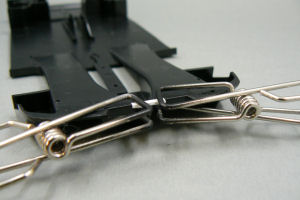
Because I'm using different wheels instead of the kit supplied ones, it was about time to check whether it was necessary to adapt the wheels and/or suspension.With the aid of Tamiya masking tape I assembled the suspension of the car (including the brake discs) to check how the stance of the car would be.
In the pictures below you can see that the wheels aren't "wide" enough.
So after some more testfitting and experimenting I added spacers to the rear and the front wheels to move the wheels a bit more to the outside.
Luckily the pins with which the wheels are fitted to the car are long enough and I didn't have to make further amends apart from the spacers.


The body of the car is now almost completely ready for receiving a first layer of primer.
But the results of that can be seen in the next update.
2010, December 5 - On we go
It's been almost 2 years since I last updated the build report of this particular build. Shame on me.Being a father takes up a lot of time (and not to forget energy). Not to say that I've been doing nothing at all the past years.
Although the progress isn't mindblowing, there's still some progress to report. And it's about time too.
Back in 2008 I'd painted almost all the suspension and engine parts. But being just unassembled parts, they were not very interesting to show.
In the meantime the engine has been painted. It still needs a bit of a wash, as it looks way too clean and I want it to have a slightly used look.
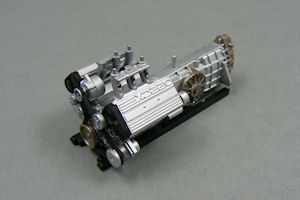
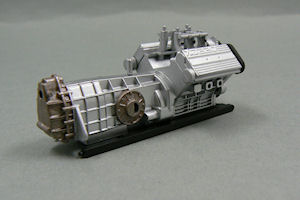
Some mold lines are still visible on the pictures. But they don't bother me in this case, as they can't be seen once the engine is buried inside the car.
And as I plan to glue the engine window shut, there's no chance anyone will ever know (unless they read it here of course).
I drybrushed some chrome silver onto the lettering, but it's really not visible against the aluminium (Revell aqua color) I airbrushed the engine with...
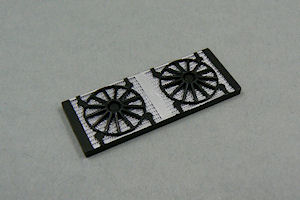
Another part I've finished is the cooler assembly, that will be mounted in the front of the car. Although I have some nice reference pics of the cooling system, this is as far as I go with it, as this part won't be visible when the car's finished.
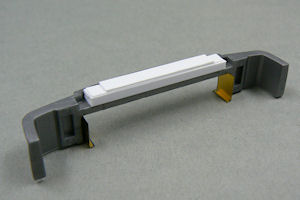
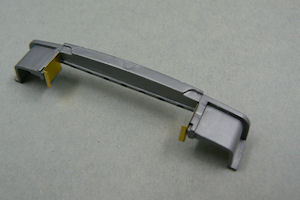
Apart from that I also did some work on the rear of the car, with the aid of the reference pictures. I added some styrene strip to make sure the body has the right stance. I couldn't see how Tamiya have solved this and where the body rests on, once the car is assembled. So to be on the safe side, I made my own "body-rest".
I also added two pieces of brass plate according to the reference picture.
In the reference picture above can be seen that there is some kind of cilinder at the back of the engine. I'm not enough of a mechanic to know what it does, but I do know that it's not in the kit, so I need to scratchbuild it as, with the opened up rear, everything is very visible in there.
At the top of the page you can see some testfitting pictures of the car. What bothered me the most about them, was that the rear wheels looked (and were actually) too small. But as I had no alternatives (I thought), I left it that way.
Until I remembered that I had some tyres and wheels left over from the build of a Jaguar XJR-9 Le Mans racer. And what do you know? The tyres were a perfect fit (well in diameter at least) for the wheels I'm using in this build.
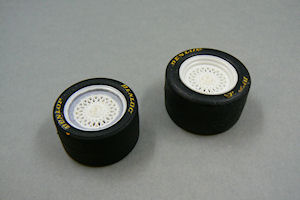

Okay, the rear tyres are a bit too wide for the wheels. But a testfit showed that this wouldn't cause any problems. And as the car will be standing on it's wheels, nobody will see it anyway.
If it really bothers me, I might add an extra lip to the rear wheels to cover it up.
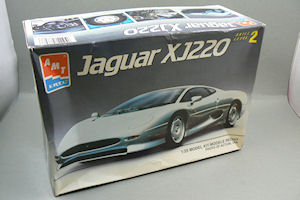
Final thing I want to show in this update is the fact that I bought another XJ220 kit, just for a LHD dashboard.
Although I need to do quite some work still on the dashboard to get it to look right, I cut some corners and bought the other kit, just to have the shape of the dash already.
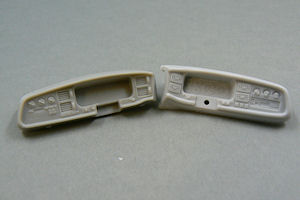
At first I wanted to cut up the Tamiya RHD dash, but I soon figured that it would be nearly impossible to get it to look anywhere near convincing. And as I could get the AMT kit rather cheap, the choice was quickly made.
The right picture shows both dashboards (left Tamiya, right AMT).
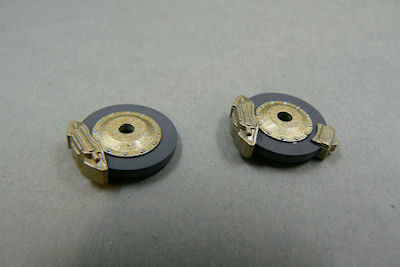
I also did some work on the brakes.
At first I had painted them according the instructions from Tamiya. But I figured that this car would have carbon brakes as it was used in GT racing, so I repainted the brake discs.
The color I used for simulating carbon is Geschützgrau from the Revell Aqua Color series. Looks pretty good to me.
I was also planning to use some Brembo decals on the brake calipers. But I didn't have any spares. And besides, nobody can possible tell if there would be decals on the brake calipers, as they're nearly completely hidden by the wheels.
So no decals.
Apart from the dashboard, there's also some work to do on the exhaust system.
I noticed in the picture of the backside of the car (at the start of this update) that there's no part of the exhaust system mounted at the back of the gearbox. It is there in the instructions of this kit.
So I concluded that for the racing version of this car, the exhaust system had been altered (which makes sense, performance-wise). And because of the open view onto the gearbox area I had to make those changes to the exhaust system too.
Which is easier said than done. I've started some work (by first cutting up the original exhaust) already but am a bit struggling with how to fix the new exhaust to the car body.
That's it for now. Let's hope the next update won't be as long...